![]()
Do you want to start a food blog, but don’t know how?
Starting a food blog can sound quite technical. It is hard to know where to start. You hear things like “you need a hosting account, and a .com”. This guide will make it easy, and will take you through all the steps on how to start a food and cooking blog.
You will end this guide with:
- Your own food blog
- With it’s own .com
- A great looking website design
- And it will be set up with WordPress ready for you to start blogging
 The Basic Steps: Starting a New Food Blog
Here are the different steps that this guide will go over:
Step 1: Name Your Food Blog And Get a Domain Name
Get your catchy, clever, and memorable food blog name.
- Cost: Free
Step 2: Find A Dependable Web Host
You’ll need a place to store your blog online, and that is what a hosting account does. I’ll show you where and how to set one up.
- Time: 11 Minutes, Cost: $3.49 a Month with Bluehost hosting
Step 3: Install WordPress Onto Your New Domain
Once you have a .com and a hosting account, I will then show you how to install WordPress so you can start building your blog.
- Time: 7 Minutes, Cost: Free
Step 4: Install A Good Looking Theme
A WordPress theme makes your new food blog look good.
- Time: 10-15 Minutes, Cost: Free to $30
Step 5: Install These Plugins
There are a few plugins you’ll need to add to your blog, to help it run better.
- Time: 10 Minutes, Cost: Free
Step 6: Create a Logo
To make your blog look good, why not create a logo. I’ll show you where to get one quickly and at an affordable price.
- Time: 15 Minutes, Cost: $10-$30
Step 7: Start Blogging
Now you are ready to start building a successful food blog.
Step 1: Name Your Food Blog And Get a Domain Name
The hardest part of starting a food blog can be coming up with a name. You want it to be:
- Memorable
- Catchy
- And available as a .com
Don’t let not having a blog name stop you from starting. Maybe you don’t have the ‘perfect’ name. But a lot of times, a name takes on more meaning as you build the blog. I have a post that will guide you through the steps to sit down and brainstorm name ideas: How To Create Tasty Food Blog Name Ideas: 60+ Available Names.
Use the tool below to check if your name idea is available as a .com. Afterwards I will go through the steps for signing up with hosting account and getting your free domain name.
Once you have found a blog name that is available as a .com, you can get it for free when you sign up for your Bluehost hosting account here (get the ‘Basic’ plan). You’ll want to get your domain name for your food critic blog before someone else does. Bluehost is the same company I use to host Hatch a Food Blog.
In the next step I will show you how to sign up for your hosting account and how to get a free domain name.
 Step 2: Find A Dependable Web Host
A host is a company that stores all of your files online for you. They are the ones who show your website to people all over the world. A domain (.com) is the address of your blog. You need both to start a blog.
You’ll want to use a host that is reliable and is affordable for a beginner blogger.
I recommend Bluehost, they are the host I use. Bluehost is easy to use and affordable. With Bluehost you can get a free .com domain name when you sign up for a hosting account. And both are automatically connected. No need for extra technical steps.
One thing to know about affordable web hosts, is that they are able to offer low prices because you pay upfront. But if you change your mind for some reason, Bluehost will refund you for the months you haven’t used on your plan. Click here to get started with Bluehost with monthly plans starting at $3.95 a month, with a free domain name.

Here is how you get started with Bluehost:
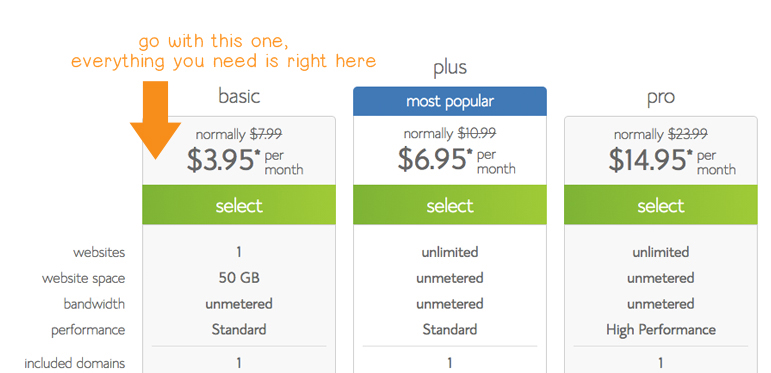
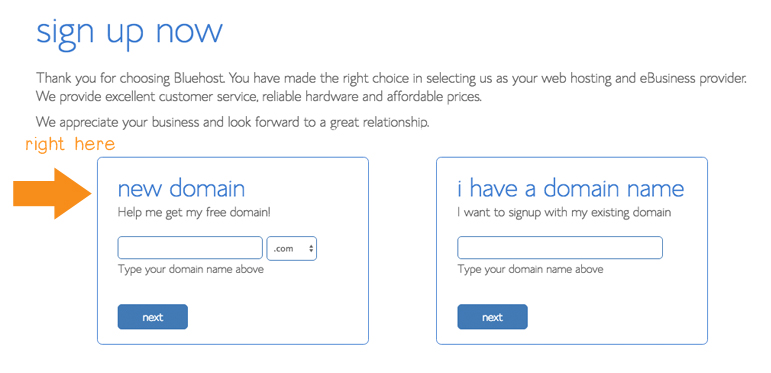
First go to the Bluehost homepage and click on the green ‘get started now’ button. Then choose your plan. Go with the ‘Basic’ plan as this covers everything you need to get started.
Then type in your blog name in the “new domain” box and click on next.
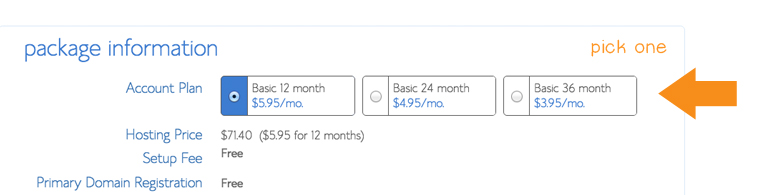
On the next page, enter in your details and select your plan. You do need to pay this upfront, so you have the choice of 1 year, 24 months, and 36 months. The longer the plan, the more you save.
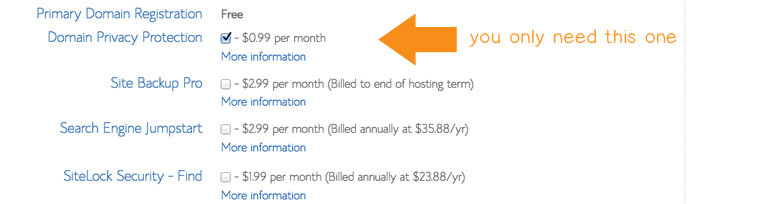
Only have the privacy add-on selected. This keeps your address private, and is not published online.
Once you have done that, you will have your very own .com and hosting account. The next step is to install WordPress onto your domain so you can start building the best food blog.
Step 3: How To Install WordPress Onto Your New Domain
Once you have your hosting account and domain name set up, the next step is to install WordPress so that you can start posting. Bluehost shows you how to install Wordress here. Only a few clicks and you are done installing WordPress onto your new .com.
Step 4: Install A Good Looking Theme
Now that you have your food blog set up with WordPress, it is time to quickly get it looking good.
You don’t want to spend too much time here, since you’re main priority needs to be publishing posts. A lot of beginners make the mistake of spending way too much time editing and tweaking their site, even though they have no visitors.
To avoid this, follow these steps to get a good looking theme and get this part out of the way.
You can always start with a free theme, but they tend to look pretty clunky, and not well designed. Great looking and affordable food blog themes and templates start from $39, and they go up past $99 for themes with more features.
Where To Find a Great Looking Food Blog Theme
Have a look at my post that highlights the The Best Yummy WordPress Food Blog Themes: For Recipes and Bloggers. A lot of the more inexpensive themes, around $39, are perfect for a beginner food blogger. They include features such as recipes cards, and recipe index pages – and they look good too.
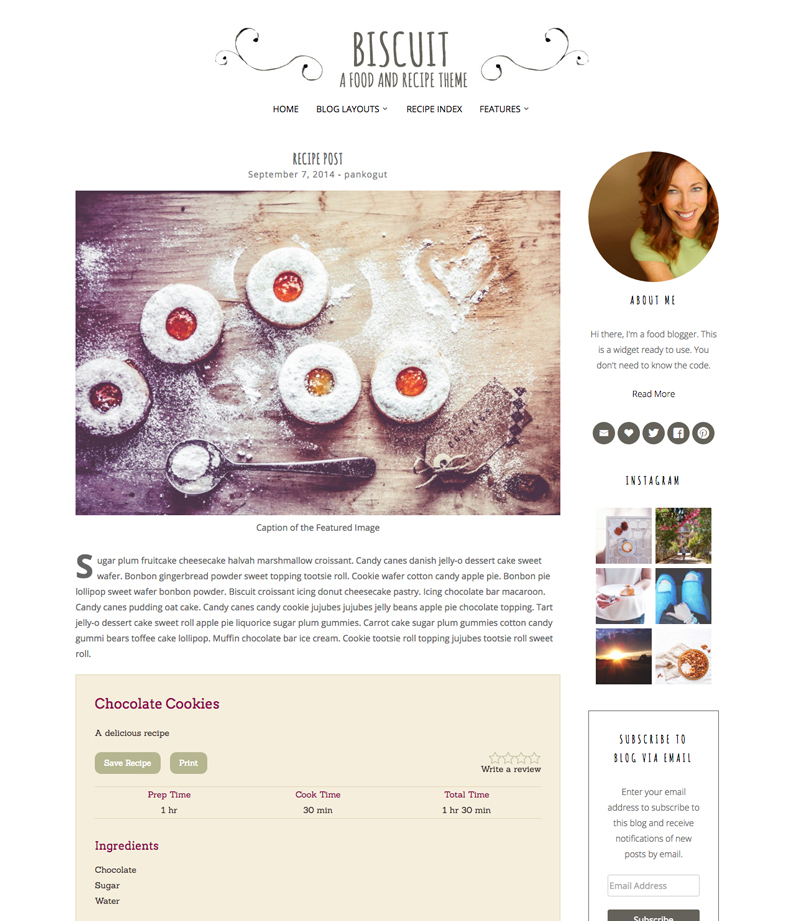
The Biscuit theme is my favorite one. It has a handwritten design style to it, and comes with a recipe card plugin and recipe index feature – everything a new blogger needs. And with themes costing upwards of $99, the Biscuit theme is a really affordable one costing $39 from Creative Market.
How To Intall A WordPress Theme
Once you have a theme picked, this is how you install a WordPress theme. It only takes a few clicks, and you are done.
Step 5: Install These Plugins
Now that you’ve got your blog looking good, we need to tweak some of the technical things to make your new food blog run smoothly. This won’t take long.
Permalinks: When you’ve logged into your blog through WordPress (just add /wp-admin to the end of your domain name to log in so: www.__yourdomainname__.com/wp-admin) , go to Settings —> Permalinks and select “Post name” and click on save.
Plugins For Food Blogs
You can add plugins by going to Plugins —> Add New. You don’t want to be adding too many plugins as this can slow down your site. Here are a few to get you started.
- Aksimet: Bloggers get a lot of spam in their comments. This plugin helps weed out the spam from the real comments – and it is free to use. You do need to create a WordPress account to get a free user key to activate it. All the instructions are included.
- AddThis: You’ll need social media buttons on your blog posts so that people can share them. This plugin adds these buttons to your posts, and makes it easy for people who visit your recipe blog to share them.
- Pinterest RSS Widget: This plugin lets you display your Pinterest feed in your sidebar
- Recipe Card: Quite a few of the premium themes in my top 10 WordPress Food Blog Themes list include a recipe card plugin. This lets you to easily display the steps, and ingredients needed to cook your recipe. A plugin like this also makes it easy for your readers to print out the steps in a compact sheet.
If the theme you chose does not come with a recipe card plugin, you can always install one for free. Use the Yumprint Recipe Card Plugin.
Step 6: Create a Logo and Header Design Easily
The first thing that people see when they visit your blog is the header. This is where your blog’s name will be. Because you are starting out, you don’t want to spend too much time designing your header, but you still want to make it look good.
I would recommend getting a premade food blog logo. This is a fast and inexpensive way to create a great looking header and logo for your blog. Once you start building a large audience and want to get more professional, then will come the time to get a more expensive custom food blog logo and branding.
Check out my shop for inexpensive logo and header design packages. Prices start at $10, and in 2 days you could have a great looking header and logo design for your food blog.
Step 7: Start Blogging
Now you are ready to start blogging.
Check out my homepage for more articles on the different areas of food blogging: such as food photography, and the art of food blogging (promotion, how to make money with with a food blog, and why people fail).
Recommended Reading
- How To Be Successful: Why New Food Bloggers Fail: There is a common pattern I see as to why a lot of new food bloggers give up within their first month. This post I wrote goes over the ways to avoid these mistakes.
- Food Photography Guide For Beginners: To get your recipes and food posts spread online, you’ll need to have good looking photographs of your dishes. There are a lot of submission websites where you can submit your recipes, and these help build traffic to your blog. But these sites are quite strict on the quality of the photographs they post. Follow along with my guide, and I’ll show you the fastest ways of improving your food photography.
Comments are closed.